Setting up Strapi
We've chosen to work with Strapi for this example because it's open-source and pretty easy to use and customize. I would expect that much of what we cover will apply to other CMS's. Feel free to take a look at Strapi's documentation to help you along.
Requirements
In order to run Strapi locally you need the following:
| Software | Minimum Version |
|---|---|
| Node.js | 12.X |
| npm | 6.X |
Addtionally we'll be using yarn throughout this guide. You can install it by following this getting started guide.
Install Strapi Locally
Installing Strapi is simple, just run the following command.
yarn create strapi-app tina-strapi-server --quickstartThat's it! You've just installed Strapi locally 🎉. A browser window has probably opened for you and is prompting you to create an administrator account. Before we do that, let's go ahead and make Strapi even easier to use by installing the GraphQL plugin. Hit Ctrl+C to shut down the server and then run the following command.
cd tina-strapi-server
yarn strapi install graphql
Now you can restart the server and set up your local administrator account.
yarn developKeep in mind that the administrator account you create now will only be used for Strapi management. We'll be setting up separate accounts later to get access to the Strapi APIs.
Create Some Content Types
We'll set up a simple blog with two content types: Blog Posts and Authors.
Set up the Author Type
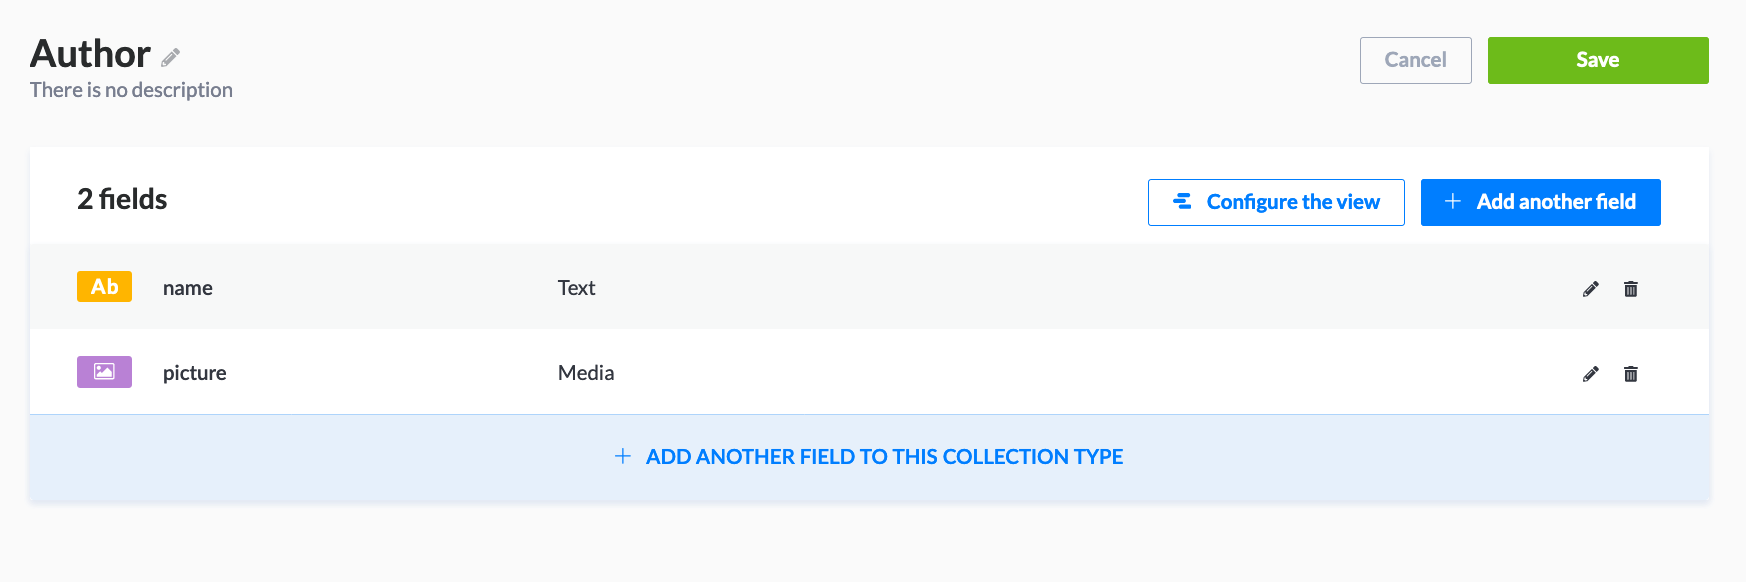
Our authors will be straightforward with only a name and a picture field.
Open up the Strapi management console at http://localhost:1337 and click on Content-Types Builder in the left-nav. Click Create a new collection type and enter Author as the display name. Note that Strapi will automatically generate an API friendly name for whatever you input here.
Next, you'll be presented with all of the fields that you can add to your content type.
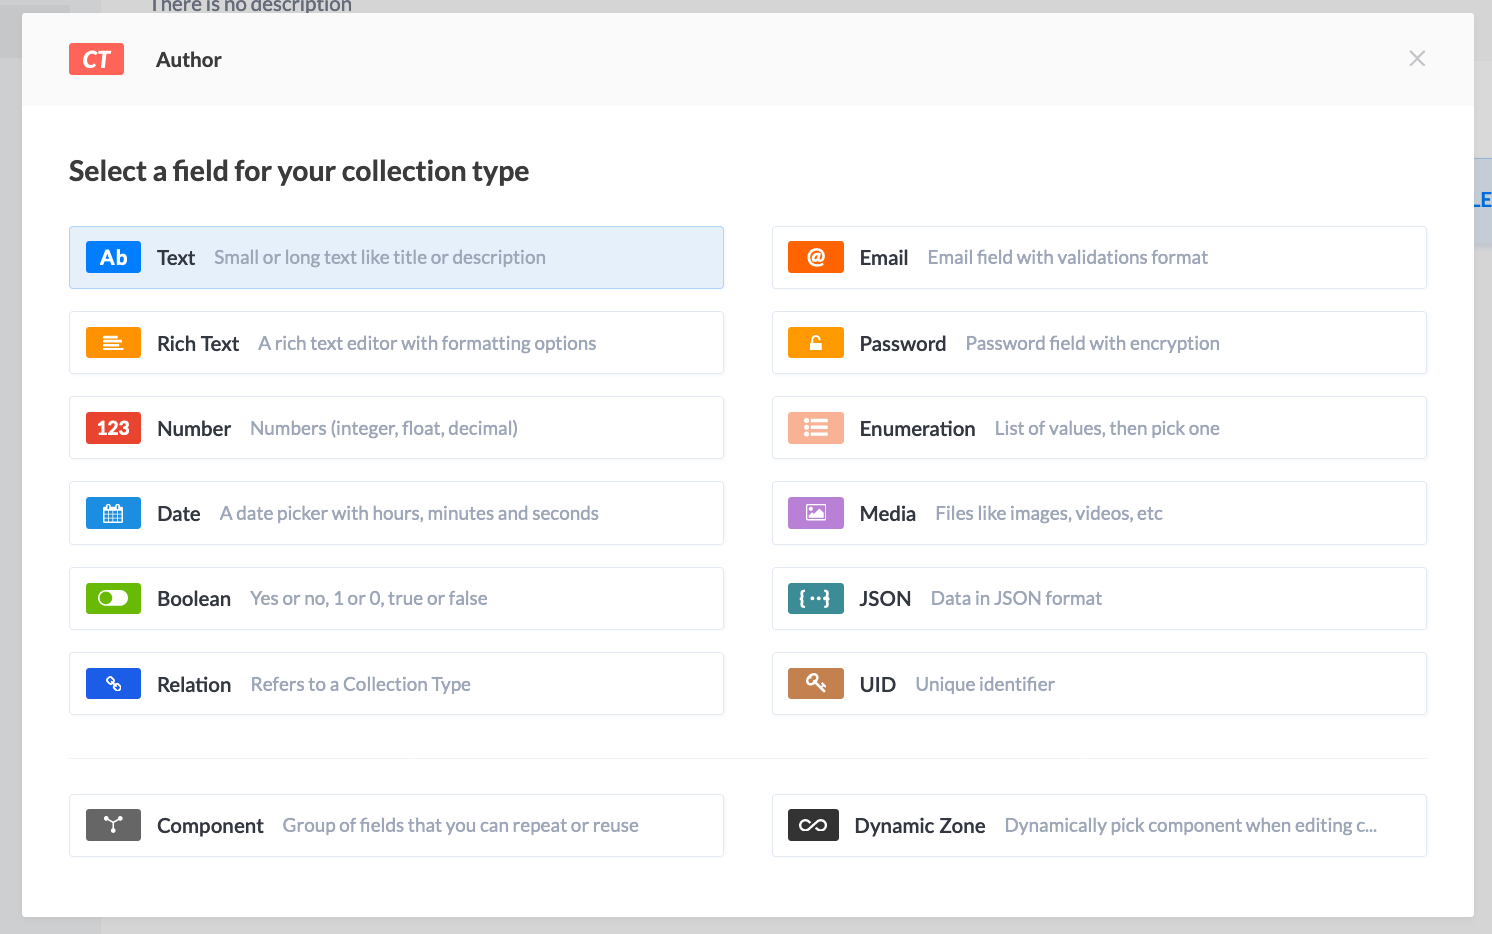
The two field types we'll use for an author are Text and Media.
Click on Text and enter name as the field name. Click on the Advanced Settings tab and make this field required. Easy enough!
Next, we'll click on Add another field and select the Media type. We're going to call this field picture and switch the type to Single media. Once again, move over to the Advanced Settings tab and change the allowed types of media to only allow images. Click on Finish and then click on Save. Strapi will quickly restart the server, and your content type will be ready to use.
I'm choosing field names to best match what the Next.js starter will provide us with in later steps. If you want to name them something different, keep in mind that you might need to make some extra changes on the front-end
Set up the Blog Post Type
We're going to structure our Blog Post type to match the following:
| Field Name | Type | Advanced Settings |
|---|---|---|
title | Text (short) | required, unique |
content | Text (long) | |
excerpt | Text (long) | |
coverImage | Media (single) | Allowed Media: Images |
slug | UID (linked to title) | required, unique |
date | Date (date) | required |
authors | Relation (many-to-one) |
Click the Content-type Builder and Create a new collection type. We'll name this type Blog Post.
Let's set up all the fields:
- Create a short-text field called
title. Make it required and unique, since we'll have Strapi generate a slug based on this field. - Create two long-text fields called
contentandexcerpt. - Create a new single-media field called
coverImage. It should only accept image files. - Create a new UID field and call it
slug. Under Attached field choosetitle. Make this field required and unique. This field will automatically be populated from the post'stitle. - Create a new Date field and name it
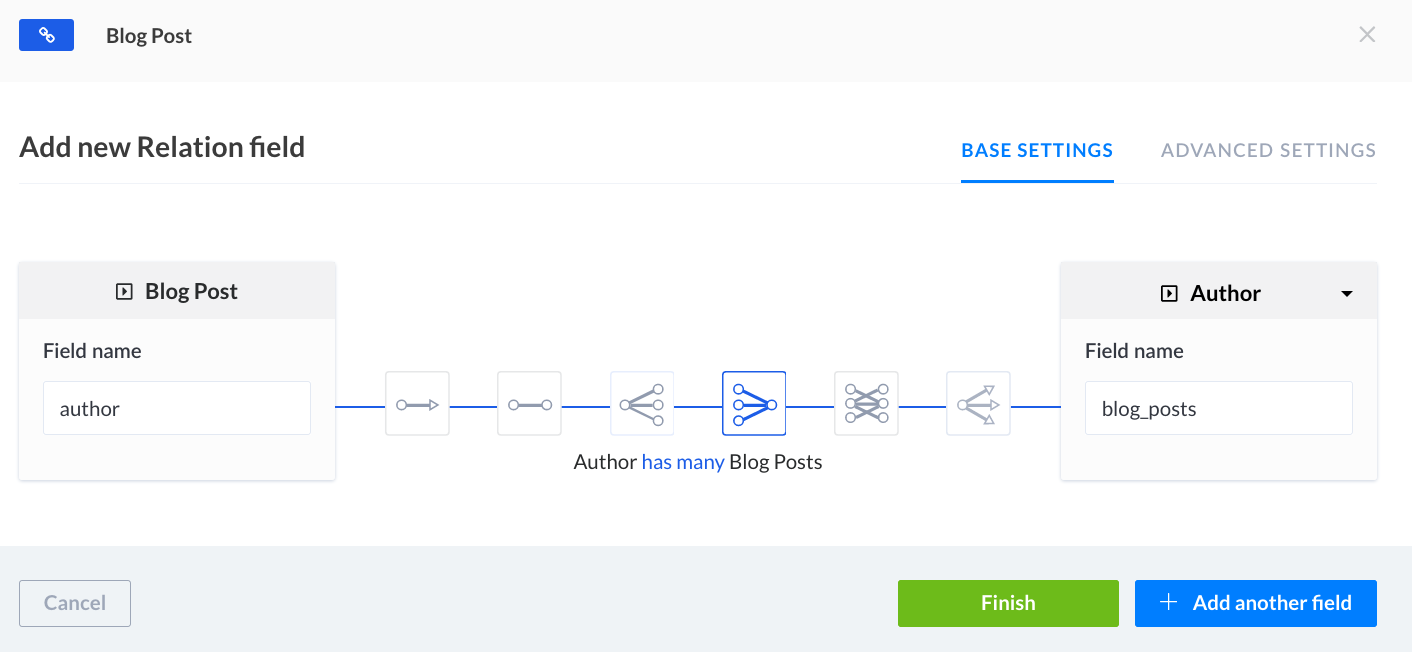
date. We'll make this a date only type and make it required. - Create a new Relation type and choose the relation that says "Author has many Blog Posts." This will add a field to both content types, which could be useful in the future if we want to add the ability to see all the posts an author has written.
After you've created all these fields, don't forget to hit the Save button.
Create Sample Data
All that's left for our initial Strapi setup is to create some sample data.
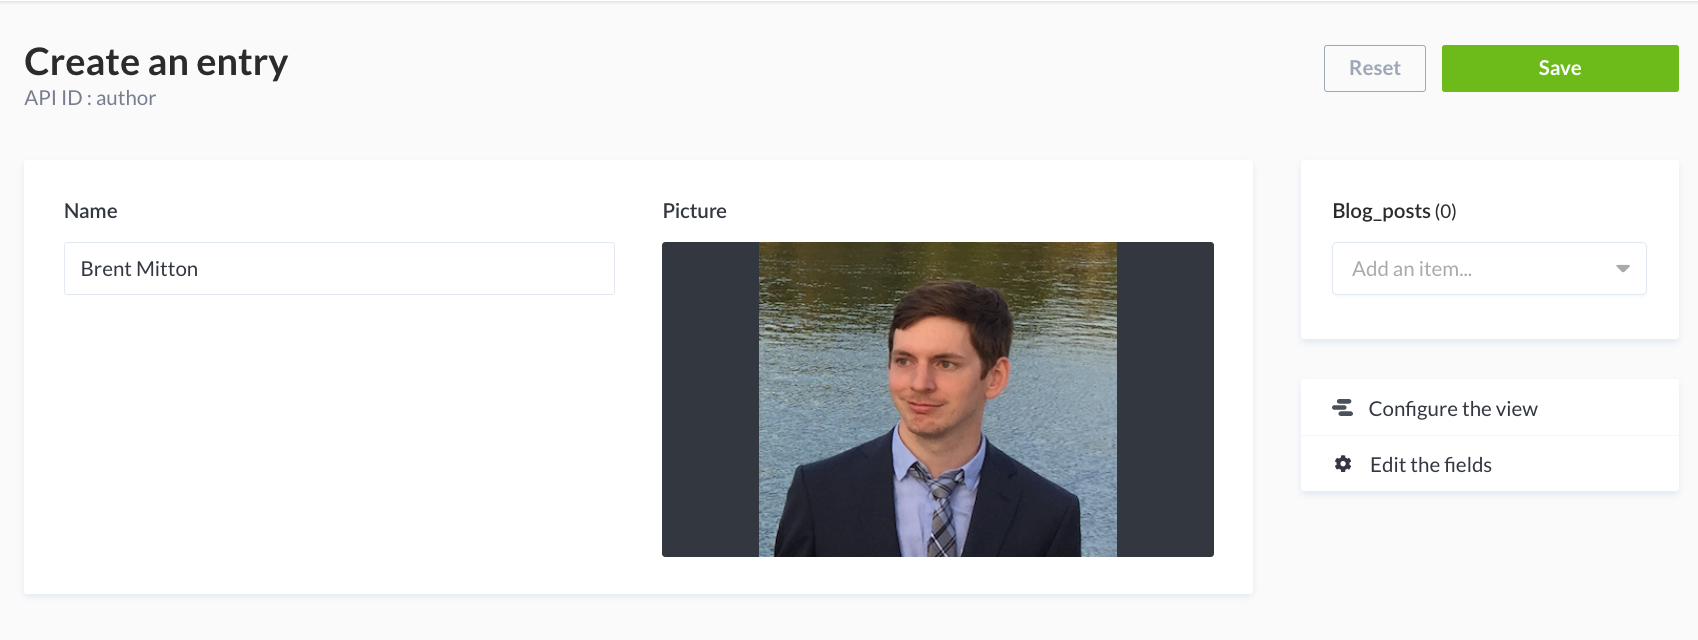
Under the Collection Types section of the left-nav, click into Author and then Add New Author. This is all pretty self-explanatory, give your author a name and a beautiful picture and then hit Save..
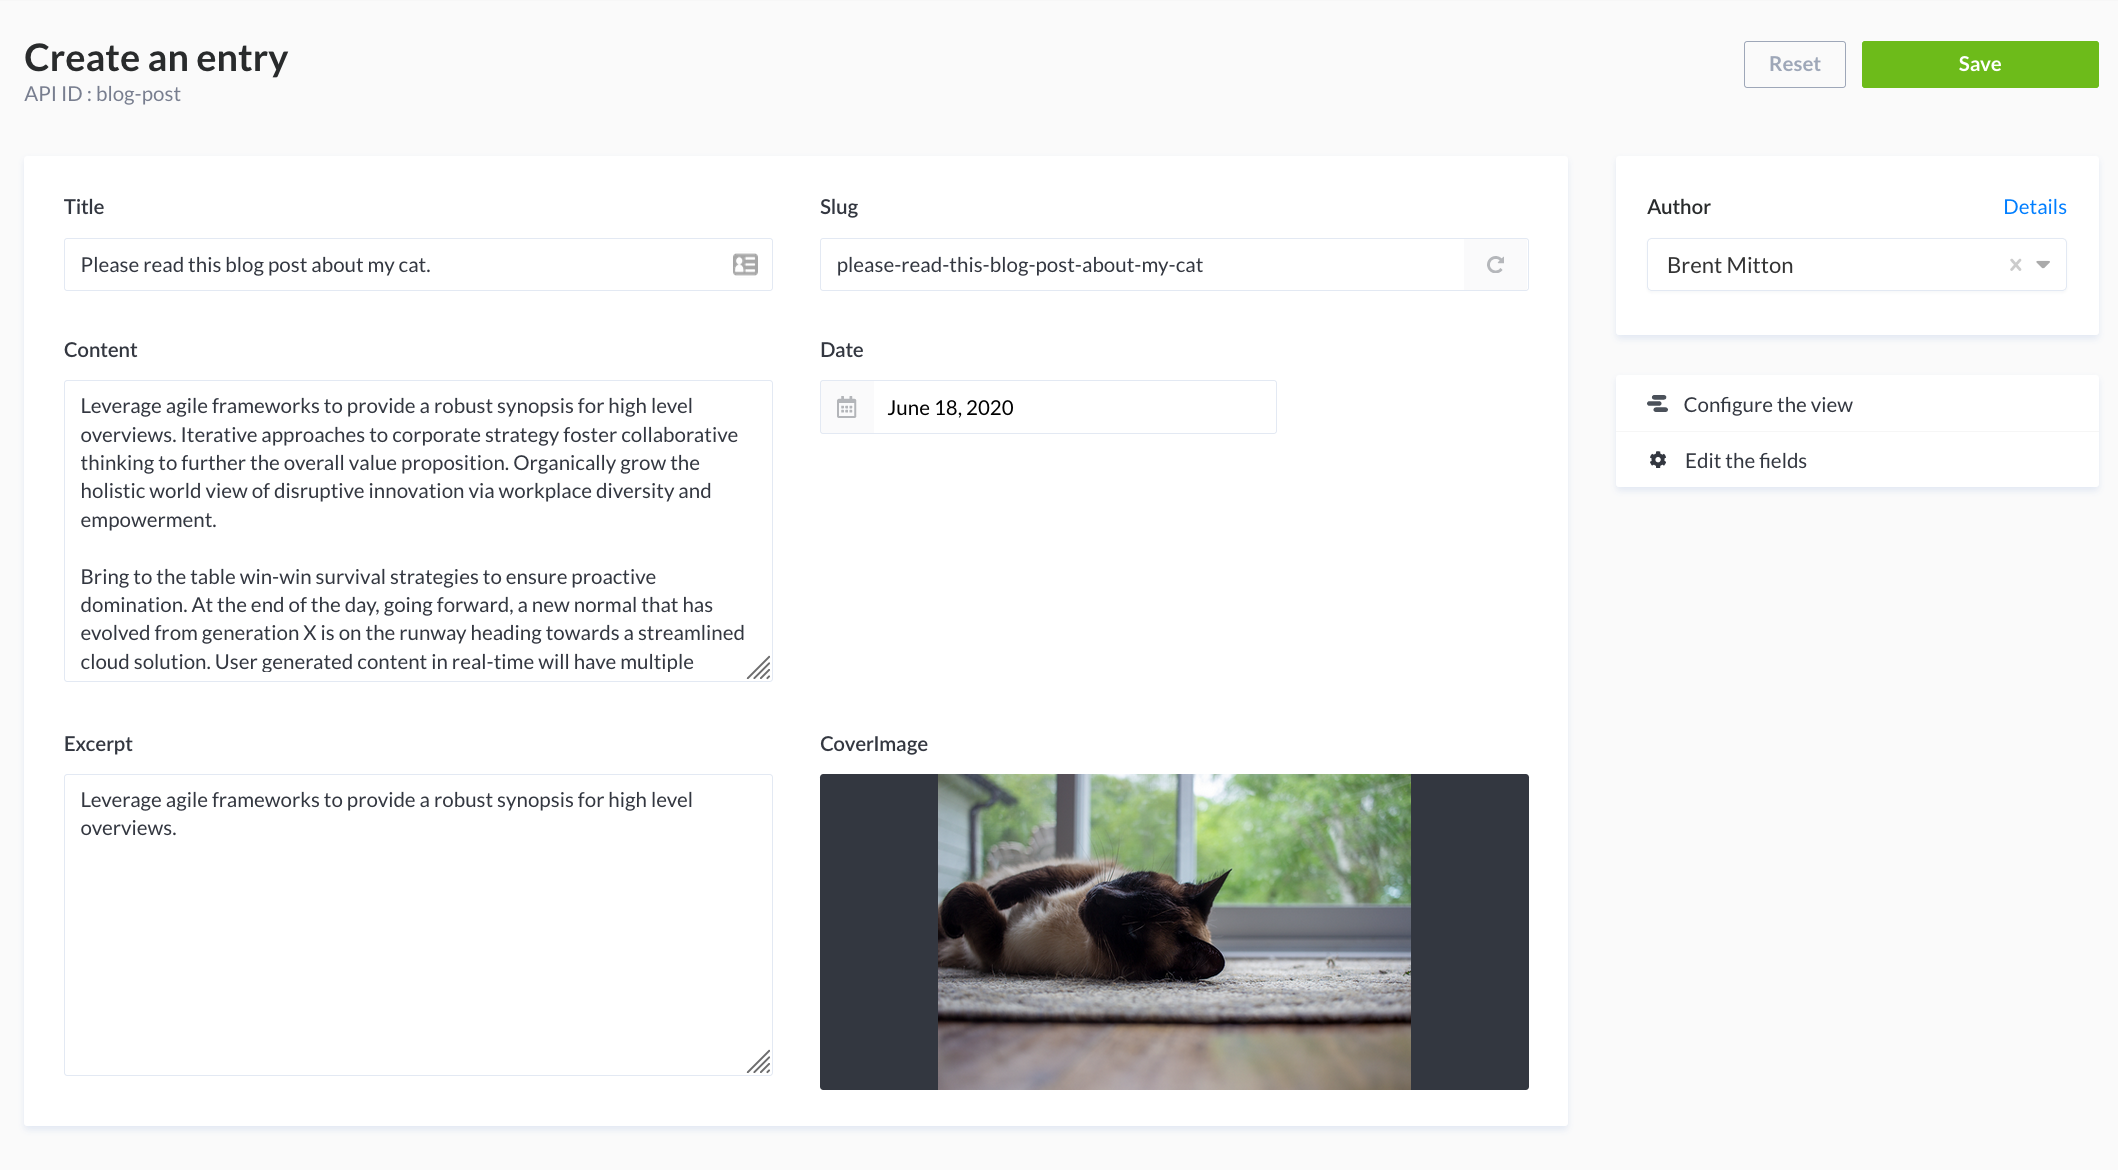
Now create some sample blog posts. I'd recommend two or three, so we can better demonstrate some features on the front-end when we get there. I'd recommend using a fun lorem-ipsum generator as a placeholder for your blog content. Don't forget to link these posts to the author that you previously created.
Conclusion
That's the end of our general Strapi setup. We'll be coming back a few times to tweak some settings as the need arises. Let's get started setting up a front-end with Tina to use our shiny new Strapi back-end..